Kodak DCS Pro 14n Digital SLRKodak's latest digital SLR brings full-frame, 13.7 megapixel resolution to market for under 5,000.<<Optics :(Previous) | (Next): Shutter Lag & Cycle Time Tests>> Page 6:Exposure & FlashReview First Posted: 03/23/2003 |
Exposure
| Free Photo Lessons | |
|
In any of the camera's exposure modes, except Manual, the exposure compensation adjustment lets you increase or decrease exposure in one-half-step increments from -3 to +3. (For the record, I greatly prefer having the option of a one-third step size on digital cameras, as a full half-stop adjustment is really too coarse, leaving too large a step between one exposure setting and the next.) The 14n offers three metering systems: Matrix / 3D Matrix, Center-Weighted, and Spot. In Matrix mode, the camera divides the image area into 10 segments and meters each one individually. The camera then examines overall brightness and the differences between the various segment readings to determine the best overall exposure for the scene. If a Nikkor D-type lens is in use, 3D Matrix metering is available. Also dividing the image into 10 segments, 3D Matrix mode not only reads brightness, but also takes into consideration scene contrast and subject distance to provide a more accurate exposure. Center-Weighted metering reads the exposure from a fairly large area around the center of the frame, while Spot metering looks at only a small point in the very center. If you're uncertain of an exposure, the 14n's Auto Exposure Bracketing mode captures a series of images at different exposures, bracketed around the main metered setting. Through the settings menu, you can specify a series of either two or three frames, as well as the order of capture. (For example, under/over/normal vs under/normal/over.) Exposure can vary as much as +/- 2 EV between subsequent shots.
The camera's AE/AF Lock button lets you lock exposure and/or focus without half-pressing the Shutter button. In the settings menu, you can configure the AE/AF button to lock either exposure, focus, or both.
The 14n features a Digital Exposure Correction (DEC for short) option through its record menu, a very unusual feature for a professional-level camera. This automatic adjustment examines the image post-exposure, and makes minor adjustments to the tone curve and color balance to produce what it thinks is a more correct overall exposure. Note though, that this doesn't correct for improper shutter speed, aperture, or ISO selections, it merely tinkers with the image data after it's acquired. For JPEG files, the change appears directly in the files themselves. Data in RAW files is not adjusted directly, although an adjustment setting is saved for optional application later, in Canon's Mac- or Windows-based image processing software. This could be a handy option when used in conjunction with the 14n's simultaneous dual-format RAW/JPEG file capability. The JPEG files would reflect the camera's adjustments, while the RAW files would preserve the original image data.
I didn't experiment a great deal with the 14n's DEC option, after having a somewhat negative experience with it in my initial night shooting at PMA in Las Vegas. Reading about the option, I decided to turn it on, but also have the camera save RAW files as I shot. I figured this would be the best of both worlds, as I'd have the benefit of DEC in the JPEGs, but still be able to revert to the RAW files if I needed to. As it turned out, it was very fortunate that I chose to also save the RAW files, as the DEC pretty much made a hash of the night-scene JPEGs. The problem was that DEC kept thinking that the shadow areas were too dark, tweaking the tone curves to boost the brightness there. Unfortunately, in the process of doing this it horribly amplified the image noise, producing incredibly blotchy shadows. I suspect this feature may work much better under daylight shooting conditions, but once bitten, I was twice shy, and so ended up leaving it turned off the rest of the time I had the camera. (See my notes below about the JPEG format files from the 14n though. - They're really suboptimal at this stage of the firmware development, so I ended up shooting almost exclusively in RAW mode anyway.)
Another option, called "Look" in the settings menu, applies a tone scale/color saturation adjustment to captured images. Two adjustments are available: Portrait and Product. The Portrait setting lowers contrast to improve detail in the highlights and shadows, while Product mode increases contrast and color saturation. Just as with Digital Exposure Correction, the Look adjustment applies immediately to JPEG files. RAW files are tagged according to the Look they were captured with, and the adjustment is applied when they're viewed with Kodak's Photo Desk software.
Depending on the image resolution that's selected, the 14n offers an ISO range from 80 to 800. The maximum for full-resolution 13.5-megapixel files is 400. While very long shutter times (including bulb exposures) are supported by the camera body itself, sensor noise effectively limits maximum exposure times to a second or less. While it's possible that full-production cameras will do better in this regard, I sincerely doubt it. The noise appears to be a consequence of the sensor technology Kodak is using, and as far as I can tell, the only changes being made at this point involve firmware, not the camera's hardware. The 14n does offer quite a bit of control over noise-reduction processing (particularly in the Photo Desk software), but in my experience with it, it was difficult to significantly reduce image noise without also losing some subject detail as well.
White balance options on the 14n include Auto, Daylight, Tungsten, Fluorescent, and Flash presets, and a Click Balance (manual) setting. Within each of the presets, you have a handful of options. For example, the Daylight setting offers Standard, Warm, and Cool settings, and the Flash preset offers Standard, Warm, Cool, and Studio options. The Click Balance option analyzes the RGB values from the most recently captured image, or a saved image, and applies them to the next image captured. Thus, you can snap an image of a gray card under specific lighting, and then apply that color balance to each subsequent image. Once you've selected Click Balance, an eyedropper appears over the image, letting you pick the specific area you want to use as your white balance reference.
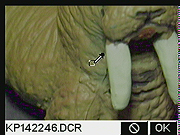 A
particularly nice touch on the 14n is the degree of precision with which you
can select white- or gray-point references for determining color balance. You
can zoom in on the image on the LCD screen and move the selection eyedropper
with the arrow keys to sample a specific part of the frame. (See the illustration
at right for an example, with an image zoomed way in on the LCD screen.) This
is a great feature, making it easy to zoom in on just a part of the subject
to select your white/gray reference point.
A
particularly nice touch on the 14n is the degree of precision with which you
can select white- or gray-point references for determining color balance. You
can zoom in on the image on the LCD screen and move the selection eyedropper
with the arrow keys to sample a specific part of the frame. (See the illustration
at right for an example, with an image zoomed way in on the LCD screen.) This
is a great feature, making it easy to zoom in on just a part of the subject
to select your white/gray reference point.
The 14n also features a Sharpness adjustment, with settings of None, Low, Medium, and High available on the camera. These settings are applied directly to JPEG image files, but once again are simply saved as tags on RAW-format (DCR) files. Tagged DCR files are automatically processed using the selected sharpening setting whenever JPEG or TIFF files are extracted from them with Kodak's Photo Desk software. The sharpening tool in Photo Desk offers good control, although it lacks an effective on-screen preview of the results of your settings, making it awkward to work with interactively. - See the subsequent software section of this review for more detail on Photo Desk's options and control panels.
A Self-Timer mode provides a 10-second delay once the Shutter button is pressed, giving you time to run around in front of the camera before the exposure.
File Format Issues
While the Pro 14n can write either DCR (RAW) and JPEG files (or even both simultaneously),
the two file formats are definitely not equal partners in the camera's design
and workflow. Kodak itself readily admits that their in-camera JPEG generation
leaves something to be desired. For critical work, you'll really want to save
your images in the DCR format in the camera, and then extract the final JPEGs
from the DCR files with Photo Desk when you're back at the computer. This is
a bit of a hassle, but it's pretty safe to assume that some future firmware
update will improve the camera's JPEG code. (This is one area where Kodak deserves
enormous credit: They've consistently done an excellent job of supporting their
camera products with field-installable firmware upgrades, a good hedge against
both new-product birthing pangs and early obsolescence.)
Flash
The 14n features a built-in, pop-up flash unit with a guide number of 12 meters (39 feet) at ISO 100. For a standard f/2.8 lens, this would translate into a flash range of roughly 14 feet (4.3 meters). Depending on the lens in use, the flash unit offers D-TTL metering control in three modes: 3D Multi-Sensor Balanced Fill-Flash for Digital SLR, Multi-Sensor Balanced Fill-Flash for Digital SLR, and Standard TTL Flash for Digital SLR. With 3D Multi-Sensor Balanced Fill-Flash metering (Type G or D CPU lenses), the flash balances the exposure based on readings from the 3D Matrix Metering system. The built-in flash operates in either Front-Curtain Sync, Slow Sync, Rear-Curtain Sync, Red-Eye Reduction, or Red-Eye Reduction with Slow Sync modes. A Flash Exposure Compensation adjustment controls flash intensity, adjusting it from -3 to +1 EV in one-half-step increments.
For connecting more powerful flash units, the 14n also features an external flash hot-shoe as well as a PC sync terminal. The same D-TTL flash metering modes are available, depending on the type of lens and speedlight connected to the camera, and the full range of flash sync modes are available as well.
Continuous Shooting
Through the camera's Drive setting, the 14n features a Continuous Shooting mode that captures a series of images for as long as the Shutter button is held down. The manual claimed a frame rate of 2.5 frames/second, but my tests showed a maximum rate of only 1.72 fps. Actual frame rates will vary, depending on the JPEG compression and image resolution settings, and the number of images in the series will depend on the amount of available memory space.
Sound
The 14n also lets you record short clips of sound to accompany captured images. The manual doesn't specify how long you can record sound, and I didn't test this function while I had the prototype unit on hand.
Variable Cropping Ratios
An unusual feature of the 14n is it's provision for a variety of different cropping
aspect ratios. "Aspect ratio" is simply the ratio between the length
and width of the image. Common examples are the 2x3 ratio of conventional 35mm
film (making 4x6 prints a perfect fit), the 4x3 ratio of computer screens and
most consumer digicams, etc. The Pro 14n offers aspect ratios of 2x3, 4x5, and
2x2. Like many other exposure parameters, the crop aspect ratio setting applies
directly to JPEG images created in the camera, but only exists as a "tag"
on RAW-format DCR files. With DCR files, the full sensor information is saved
in the file, regardless of the crop ratio selected, but the chosen crop ratio
is recorded in the file header. The crop is applied when the images are opened
in the Photo Desk application, and the crop can also be changed at that point
as well.

Follow Imaging Resource: